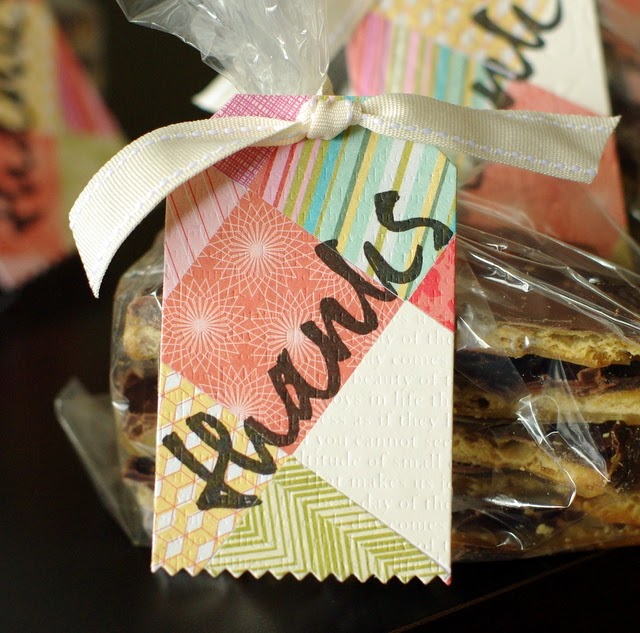
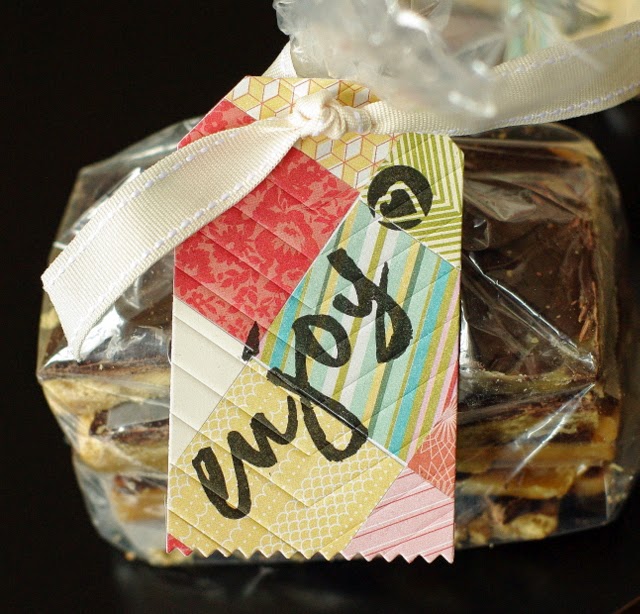
Today, I have some treat bag tags to share that I made using Papertrey Ink's
Here's what I did.
I chose some coordinating patterned papers from a Basic Grey 6x6 pad and
cut them into 1.5" squares.
Then, I adhered a bunch of them to a 8.5x11" sheet of thinner white card stock, but at an angle.
I trimmed the sheet to two 11"x4.25" pieces and ran these through my die cutting machine with my
Papertrey Ink Tag Sale #7 die.
I stamped a sentiment from Wet Paint onto each tag.
Then, I wanted to impress the pattern onto each tag for the MIM challenge,
but I couldn't decide which one to use.
So I used all of them. :)
This one is hard to see, but I used the Simple Stripes IP, the thin stripes side, horizontally.
And on this one, I used it vertically.
I used the other side of the Simple Stripes IP, but this time vertically.
And again on this one, but vertically.
I used one side of the book print impression plate on this one.
And the other side of it on this one.
For this one, I used my paper beads die with my embossing mats.
I used my Lil Inkers cover plate on this one.
And on this one, I used my PTI Centrestage cover plate.
And what are the treat bags for?
I took them to the high school yesterday for our parent-teacher conferences.
Just a little thank you for the hard work the teachers do.
In them is Butter Crunch, my favourite treat to share.
And I thought I'd share the recipe here, since I get requests for it.
Butter Crunch
Approx. 35 unsalted soda crackers
1 cup butter (I use margarine)
1 cup brown sugar
1 tsp vanilla
1.5 cups chocolate chips
Skor Bits (optional)
Preheat over to 350˚F.
Line a baking sheet with aluminum foil and spray with oil.
(I usually take the wrapper from my margarine block and rub it over the oil on the aluminum foil.)
Lay crackers on the cookie sheet until it's completely covered (I end up cutting 5 crackers in half to make everything fit nicely.)
In a saucepan, over medium heat, melt the butter and brown sugar.
Bring to a boil, stirring pretty constantly, until it thickens.
Remove from heat and add vanilla. Stir.
Pour over crackers.
Bake for 6 to 7 minutes.
Remove from oven and pour chocolate chips over top.
Let melt (maybe 5 minutes or so) and spread with a knife.
Sprinkle Skor Bits over top (I omit this part if I'm giving it away, because there are traces
of nuts in the Skor Bits.)
Place in fridge until cool. (A few hours)
Remove from fridge, peel aluminum foil off of the bottom and cut into pieces.
Store in fridge.
And that's it!
I'm also linking these tags up to this week's
Thanks for looking!


Yummy...the butter crunch looks amazing! And the tags are gorgeous Leigh!
ReplyDeletegreat idea , i think i just might try this for easter treat's, and welcome to paper crafters library... great place to hang out
ReplyDeleteYour tags are so pretty and those treats look delicious.
ReplyDeleteThese are so awesome Leigh! So funky!
ReplyDeleteI love your beautiful tags. I bet the teachers did too!
ReplyDeleteAbsolutely, wonderfully gorgeous tags, Leigh! Of course you used them all - they're sooooo pretty! As for the butter crunch treats...yummmmm!
ReplyDeletec
Leigh, the whole school board must light up when you enter a room! These look scrumptious! And the tags, well just perfect. They say 'homemade with love'. and thanks for the recipe! Doesn't look too hard!
ReplyDeleteLove the tags and the fabulous treat for the teachers.
ReplyDeleteThese look scrumptious and your tags are so pretty Leigh!!
ReplyDeleteLove the quilted tags, great idea!
ReplyDeleteAwesome tags Leigh!
ReplyDeleteyou're so nice always delivering little treats! i'm sure they are appreciated and everyone loved your tags!
ReplyDeleteI've taught for 38 years and this May I'm retiring. You're so kind to think of your teachers and surprise them with little treat bags...and they're are so darling! You don't know what these kindnesses mean to teachers. Thanks for sharing your recipe also - my mind was thinking about what you had put in the bags! Yummers!
ReplyDeleteThese are just fabulous. Love how you created the paper and then gave it some texture.
ReplyDeleteCaroline xxx
These tags are just awesome! And that you've used all different "quilt" embossing makes them even more special. Thanks too, for sharing your recipe...looks delicious! Will definitely give this a try. Have a great week. Bev
ReplyDeleteSuper cute idea! Congrats on the Paper Crafter's Library!
ReplyDeleteSo Awesome and Yum!!! I wish I live close to you *-*
ReplyDeleteYummy! I love those quilted tags Leigh~
ReplyDelete