Saturday, March 29, 2014

So proud

This week, Austin was in five skits in his high school drama group's
performance of "A Completely Incomplete History of Comedy."
He was wonderful!
I was so happy to see him put effort into this and
do such a great job!


I wanted to let him know how proud I am of him,
so I made him a card.


I started with a base of Basic Grey Carte Postale patterned paper.
Then, using my new A Few Pointers dies, I die cut my vintage cream card stock for
this week's Make It Monday at Papertrey Ink: DYI Cover Plates.
I die cut some more Basic Grey patterned paper with the same dies
and stamped them with the A Few Pointers stamps.
I stamped the "so proud of" from Wonderful Words: Additions &
die cut the "you" from true black card stock.

Thanks for looking!

Friday, March 28, 2014

Cas-ual Fridays #130


Today, I'm stopping in to share a card that I made for the latest
CAS-ual Fridays challenge, which is being sponsored by

And check out the prize:


While the challenge is open to using ovals, I decided to go with an egg. ;)


I started with some Heidi Swapp patterned paper as my base.
I used the Papertrey Ink Slide Frame stamps & die to make a shaker box
a stamped egg from PTI's Scrambled Eggs as my focal point.
The sentiment is from Reverse Confetti's Carton Cuties.

Thanks for looking!

Thursday, March 27, 2014

CAS(E) This Sketch #70

Today, I have a card to share that I made for
 CAS(E) This Sketch #70 by Sam Simpson:


With this sketch, I decided to make a Mother's Day card, 
using Papertrey Ink's The Sweet Life stamp set.

Here's my card:


I started by stamping my sentiment (from Wplus9's Mother's Day Bouquet)
in dark grey ink and running the panel though my die cutting machine with my
PTI Book Print impression plate.
I die cut my scalloped and straight-edged squares using PTI's Limitless Layers: Squares.
I stamped one of the leaves from The Sweet Life directly onto the square
and the others onto die cuts, which I adhered with dimensional adhesive.
A sprinkling of Marshmallow Pretty Pink Posh sequins finishes it off.

Visit CAS(E) this Sketch to see the rest of the DT's takes on the sketch 
and to play along, if you'd like.
You have until Thursday, April 3rd to link up your card.

Thanks for looking!

Tuesday, March 25, 2014

PTI March Blog Hop


Well, it's the 25th of the month, which means there's nine months left until Christmas! ;)
I'm just kidding! (Although, it is true....)
No, it means it's time for the Papertrey Ink Blog Hop.

This month's challenge was all about "high gloss."
That's right, we were challenged to create something that with some shine to it.

I had been hoping to get my new order in time for the hop.
I had a plan and it involved Wet Paint. ;)
When it didn't arrive yesterday, I knew I had to make something from my stash.
I went online looking for a little inspiration and found it in


I love the mix of patterns and colours, 
so I decided to take my cue for these in making my card, 
while still including some white.


I used some Heidi Swapp patterned paper as my background.
On it, I stamped a sentiment from KIS: Birthday in versa mark and heat embossed it in black
to make it glossy.

I die cut the slide frame several times from orange zest card stock and 
stacked them together for some dimension.
On the top die cut, I stamped the coordinating Slide Frame stamp in versa mark 
and heat embossed it in clear embossing powder.
I die cut the slide frame one more time in white and used the centre as a backing
for my lovely Heidi Swapp acrylic butterfly.

Here's a photo taken at an angle so you can see all of the shine.


I'm also linking this card up to The Card Concept Challenge #6,
which is to create a birthday card.
The style of my card is Clean & Layered.

Thanks for looking!

Monday, March 24, 2014

Chickaniddy Crafts March Card Sketch


Today, I have a card to share that I made for the fabulous sketch 


Now, I decided to tweak the sketch to make my card after falling in love with one
of the patterned papers in the Chickaniddy Crafts Date Night Collection Pad
-- the one with the sweet row of houses along the bottom of it!

I let the houses stand in for the horizontal borders & hearts along the bottom of the sketch.

Here's my card:

Supplies: Paper (DN140S09; DN140S05): 6x6 Collection Pad (DN14PD01); 
Clear Stamps (DN14ST01), Enamel Hearts (DN14EB07)

I trimmed the house paper to 4x5.25".
Using Hello sentiment from the Date Night stamp set, I stamped on the patterned paper in Versamark and heat embossed it with some light yellow embossing powder.
Then, I inked up the sentiment again in Versamark, but this time, I inked it up in some melon berry ink before stamping it. Then, I heat embossed it with clear embossing powder.
I die cut two strips of patterned paper with some banner dies and adhered them to my card.
Three sweet enamel hearts & some stitching along the top finishes it off.

Tip: if you don't have coloured embossing powders, stamp in versa mark first,
then in the ink and heat emboss with clear embossing powder.


Be sure to stop by the Chickaniddy Crafts blog to see 
Meredith's & Kathy's takes on the sketch.

Thanks for looking!

Sunday, March 23, 2014

Always believe...


Today, I have a card to share that I made using
some Reverse Confetti stamps & dies. 


I started by diecutting the bottom half of the larger tag from Reverse Confetti's Tag Me die set from vellum and used is as a banner by trimming it down on its sides.
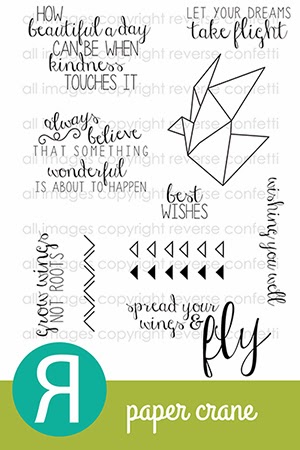
On it, I stamped my sentiment from Paper Crane and heat embossed it in white.
I adhered it to my aqua mist card stock background and stitched it in place.
Then I stamped the feather from Peacock Pretties by inking it in three different colours at once (starting with the darker blue & ending with the coral) and cut it out by hand.
I tied some Teal Twine from Pretty Pink Posh around it and adhered it to my card.
Some My Mind's Eye enamel dots finish it off.


Thanks for looking!

Friday, March 21, 2014

Our playdate -- take 1

 
The Scrapbook Cottage is a fabulous scrapbooking store in Winnipeg
that I love to visit when we go to the city.
 
I stopped in there at the end of February and Kathy showed me all of the new
products they'd gotten in..... including Chickaniddy Crafts!
As I hadn't received my Chickaniddy Crafts products yet, I was thrilled
to see them in real life!
I told Kathy that I was a member of the Chickaniddy Crafts design team
and she sent me home with some Date Night patterned paper and embellishments and
asked if I could make a layout for them to display in the store.
 
Here's the layout I made:
 
 
Date Night is a fabulous collection!
I thought it would be fun to use it to document a "date" that I had in the fall with my oldest son.
We went to see a play together -- hence the title: "our playdate" (which I diecut
using my PTI Bookprint alphabet dies.)


I made a tag in a pocket along the side, which I embellished with some Date Night sticker &
decorative brad.

 
I added another Date Night sticker as a banner along my journaling, which I diecut
with PTI's double-ended banner die.
The striped banner was diecut with PTI's Get a Handle on It.
The journaling was diecut with the largest tag from Reverse Confetti's Tag Me.
A few Date Night enamel hearts finish it off.

 
Thanks for looking!

Thursday, March 20, 2014

CAS(E) This Sketch #69

Today, I have a card to share that I made for
 CAS(E) This Sketch #69 by N@ Ali:


For this sketch, I decided to use my Wplus9 Fresh Cut Florals stamp set
and I was inspired by an image that I found on Stephanie Bryan's blog.

I loved the colour combo and how the flowers formed a wreath
around the words in the middle.

Here's my card:


 I stamped my sentiment (from Papertrey Ink's Think Big Favourites #12)
in Spring Moss.
Then I added my leaves and flowers in Melon Berry, Enchanted Evening and 
a light blue Mama Elephant ink called Winter.

Visit CAS(E) this Sketch to see the rest of the DT's takes on the sketch 
and to play along, if you'd like.
You have until Thursday, March 27th to link up your card.

Thanks for looking!

Wednesday, March 19, 2014

Monthly Moments -- February

 
Well, I finally got my Papertrey Ink order and was able to sit down
and complete my Monthly Moments spread for February.
 
For the left hand side, I created a collage of photos in Picasa and printed
them out as a 6.5x6.5" square, which I adhered to the back of my January full page spread.

 
I added some Basic Grey Persimmon patterned paper and some sweet blush cardstock along the bottom, under my journaling and added some pure poppy cardstock that I diecut
using the largest heart from Reverse Confetti's Love Note dies.

 
For the right hand side, I used a page protector that has two 3x4 pockets at the top and a 4x6 pocket
at the bottom. These are separated by a 1.25x6" pocket in the middle.
 
 
At the top, I created my own journaling tag in Word and printed it out on vintage cream cardstock.
I added a thin strip of red cardstock to it.
I diecut the journaling card and my photo using my new PTI Journaling Card 1 die.

 
I'm almost embarrassed to let you read all of my injuries from February... It was a rough month!
 
For my month, I used my new Papertrey Ink February die that I cut from pure poppy cardstock.
I layered it over some Basic Grey persimmon patterned paper-- we hardly saw any birds this
month, but I had to include these sweet little guys on my layout!

 
For my bottom pocket, I diecut part of the Basic Grey patterned paper with the Journaling Card 1 die and trimmed out the rest with my paper trimmer.
To this, I adhered my photo (also trimmed out partially with my Journaling Card 1 die)
and some journaling I'd printed out on the computer.

 
I'm really liking this Monthly Moments album and find that, so far, it's enjoyable, doable
and not stressful. :)
 
Thanks for looking!

Monday, March 17, 2014

Lucky


Happy St. Patrick's Day!

In honour of this special occasion, I made a card using the

And what better card to make for St. Patty's Day than one that includes some yummy mint green 
and the word "lucky'?
This gorgeous line was absolutely perfect!

 Supplies: Paper (DN140S09; DN140S02) ; Clear Stamps (DN14ST01)

I cut some strips of patterned paper (from Dance School & Together is Better)
and laid them on an angle on my card stock.
Using the leaf & one floral image, I stamped on my white card stock base in light grey ink.
I stamped these same images repeatedly on a die cut banner and then added the sentiment over top in 
a darker shade of grey.
Finally, I stamped them in Versamark on some vellum and heat embossed the images in white 
before cutting them out by hand.
For my "lucky", I used a Papertrey Ink die and die cut it three times: once in 
melon berry and twice in white. I adhered them together before adhering
it to my card.
I layered my card on a piece of the back of the Together is Better patterned paper.

Thanks for looking!

Sunday, March 16, 2014

March Reverse Confetti Colour Challenge


Well, it's the 16th of the month, which means that
there is a new Colour Challenge up on the Reverse Confetti blog today! 


This sweet colour combo totally put me in the mood to create a Spring card:


I used some My Mind's Eye patterned paper as my background.
On a panel of rustic white card stock, I stamped the sweet little chick from Carton Cuties 
in versafine black and heat embossed it with clear embossing powder.
Then, I pressed some green ink onto my craft mat & added some water.
With a brush, I painted the grass onto my card.
Then, I repeated the process with two shades of yellow to paint my chick.
I stamped the sentiments (also from Carton Cuties) in navy.
I used the Double Edge Scallop Border to die cut some green Chickaniddy Crafts patterned paper.
A little stitching finishes it off.


Be sure to check out the Reverse Confetti blog to see what
the other designers created using this colour combo!

Thanks for looking!

Saturday, March 15, 2014

Pages With Papertrey Sketch #31

Today, I have a sketch & a layout to share

The sketch is the next one in my Create: Sketches book.


I decided to convert the sketch to a 12x12 layout
and I used six photos instead of nine.


I used some Basic Grey Carte Postale patterned paper, postage stamps & flair.
For my title, I stamped an arrow from Reverse Confetti's Crushin' stamp set.
I diecut the letters from some orange zest cardstock using my PTI Book Print uppercase alphabet dies.


For my journaling, I used the packaging from the Basic Grey
postage stamps & typed the journaling on my typewriter.

If you create a layout using this sketch,
please link it either here in the comments or here on the PTI forum.

Thanks for looking!

Thursday, March 13, 2014

CAS(E) This Sketch #68

Today, I have a card to share that I made for
 CAS(E) This Sketch #68 by Joni Andaya:


With this sketch, I decided to make a love card, 
using some Crate Paper patterned paper and my Wplus9 Valetine Wishes stamp set.

Here's my card:


 I layered some PTI Get a Handle on It die cut banners over some white card stock.
die cut the Valentine Wishes "wreath" and stamped it in grey.
I stamped the sentiment in red and die cut the banner from sweet blush.
As a finishing touch, I added some stitching and a trio of Marshmallow Pretty Pink Posh sequins

Visit CAS(E) this Sketch to see the rest of the DT's takes on the sketch 
and to play along, if you'd like.
You have until Thursday, March 20th to link up your card.

Thanks for looking!

Tuesday, March 11, 2014

Runway Inspired Challenge #55

 Today, I have a card to share that I made for Runway Inspired Challenge #55:


As soon as I saw the photo, I was immediately inspired to use some
Here's my card:


I cut a sheet of the foil paper to 4x5.25" (isn't it fabulous?!)
Using the wonderful floral stamps from the Date Night stamp set, I stamped in Versamark
and then heat embossed in black.
An interesting effect occurred as I was heating the powder.... it started to leave spots on the
flowers -- but it wasn't unpleasant, so I went with it.
I stamped the sentiment (from Mama Elephant's Wanderlust stamp set) in
Versamark and heat embossed it in white.
A white mat finishes it off.

Thanks for looking!