Wednesday, April 30, 2014

Stamp Nation's Cards For Him Blog Hop

Stamp Nation's newest online class “Cards For Him” is now open for registration!  
This is perfectly timed for Father’s Day which is right around the corner, but of course is great for masculine card ideas year-round.
Stamp Nation has joined forces with some of the companies and their designers that have products featured in our class for a Blog Hop to celebrate our newest release.  
(I'm super happy to be joining along with the Reverse Confetti Design Team!)
There are TEN FREE class registrations, as well as a $15 gift certificate to Reverse Confetti
hidden along the hop, so make sure you leave comments along the way. 
The more comments you make, the greater your chances are for winning! 
You have until 11:59 pm on May 2nd to leave a comment to be entered to win!  
Winners will be announced at on May 3rd on Catherine's Blog.  

Click here to learn more and to Register by May 7 to get the discounted rate!    

StampNation Members, click here to grab your 50% off discount code!   


Each designer has made a card based on one theme from the Cards For Him Class.
I was inspired by the "At the Office" lessons to create my card.


I started with some My Mind's Eye patterned paper and matted it with some ocean tides card stock.
Then, I die cut some rustic white and pure poppy card stock with my Office Edges Confetti Cuts die.
I stamped the alphabet stamp from Class Act, masking out the letter "o". 
In its place, I stamped a little heart from I Like You
I coloured in the "I" & "U" with a marker & added a little Tim Holtz paper clip.
I stamped the Beautiful Banners and then selectively inked & stamped the "i love you always & forever" sentiment from Lots to Say.
Then, I die cut it, using the Beautiful Banners Confetti Cuts coordinating die.

I'm also linking this card up for this week's


Ready for the blog hop list?  Grab a cup of coffee and buckle up!  You are in for a treat, we've got tons of inspiration in store for you!
Oh, and before you go...


Thanks for looking!

Monday, April 28, 2014

Mama Elephant Photo Inspiration Challenge


I'm popping in today to share a card that I made for the 


I was inspired by the soft colours, the curved edges of the bottles
and the liquids in the bottles to make my card.


I started with a soft stone card stock base.
Then, I trimmed some card stock (PTI's white, aqua mist, tropical teal, spring moss
& hawaiian shores) by hand, adhered it to a thin sheet of card stock
and ran it through my die cutting machine with Mama Elephant's Femme Frames scalloped die.
I ran some vellum through with the stitched rectangle die from the same set.
On this, I stamped part of the sentiment (from Mama Elephant's Smitten stamp set), 
using some washi tape to mask out the "you" & heat embossed it in white.
I die cut the "you" (from PTI's Wonderful Words) three times (twice in tropical teal and once in white) and stacked them together before adhering them to my card.
from Pretty Pink Posh finish it off.

I'm also linking this cards up to this week's

Thanks for looking!

Saturday, April 26, 2014

Pretty Pink Posh Blog Hop


Well, today's the day!
I'm thrilled to be participating in the Pretty Pink Posh Blog Hop!
You have until the 28th to link up your sequin shaker cards on Paulina's blog.
It's sure to be a lot of fun!
And check out these fabulous sponsors...


And, she also has a coupon, if you'd like to add some
Pretty Pink Posh sequins to your collection:


And here's the Sequin Shaker Card that I made for the hop:


I started with an aqua mist cardstock base that I ran through my diecutting machine
with my Papertrey Ink Simple Stripes IP.
I diecut my PTI Phrase Play #1 die from some My Mind's Eye patterned paper.
I trimmed a piece of white cardstock just slightly smaller than the Phrase Play die and
used my Tim Holtz blending tool to add some ink.
I also left the bottom part of the white cardstock panel white and stamped
a Wet Paint sentiment in aqua mist.
I used the "happy" rectangle to create my shaker box by filling it with some
As a finishing touch, I added a few sequins to the card front, so it looks like
they're spilling out a little.


Be sure to check out the sequin shaker cards on Paulina's blog
and to link up your own!

I'm also linking this up to the Moxie Fab World: Hip On Handwriting Challenge.


Oh, and before you go...


Thanks for looking!

Friday, April 25, 2014

Papertrey Ink April Blog Hop


It's the 25th of the month, which means it's time for the Papertrey Ink Blog Hop.
This month's challenge is Embroidered Inspiration.

When I first heard the challenge topic, I hopped over to Pinterest to find some
embroidered inspiration.
I actually had a hard time, until I asked myself which PTI stamp set I'd like to use....
and answered that question with: feathers.

So, I searched for some embroidered feathers as inspiration and found three
photos that inspired me.

Here's the first one:

(Sorry for not linking the source, but the link seems to be broken.)

I love the colours in these aztec wood chevron earrings!
I decided to use my Papertrey Ink Centre Stage cover plate to make this card.


I die cut the Centre Stage cover plate from classic kraft, 
canyon clay, navy (MFT) and tropical teal cardstock.
I die cut the vellum using my journaling card I die and stamped with 
versamark and some navy dye ink some sentiments from Wet Paint & Wet Paint II, 
as well as the ampersand from Simply Framed, and heat embossed them all in clear.
Some stitching and some coordinating buttons & twine finish it off.

ETA: I'm also linking this up to the Moxie Fab World: Hip On Handwriting Challenge.


Next, I was inspired by this pillow...


I decided to use the leftover die cut pieces from my first card to create this card. 


I adhered the die cut arrows onto a piece of thin card stock and die cut it using
the middle size feather die from PTI's Feather Finery.
Then, I stamped over it with the coordinating stamp in versa mark
and heat embossed it with clear embossing powder.
I ran impressed my background card stock with the Centre Stage cover plate and matted
this on canyon clay card stock.
I used my new Simply Framed die to create the frame for my feather.
The banner is the larger double-ended banner die, on which I stamped a 
sentiment from KIS: birthday, in tropical teal.

And lastly...

(Again, this source was broken -- sorry!)

I love the soft feel of this embroidered pillow!
I wanted to recreate it on my card, and decided to incorporate this week's Make It Monday: Watercolour Splats.


I started with an aqua mist card stock base and stamped my feathers (again from Feather Finery)
in versamark and heat embossed them in white.
With my Tim Holtz blending tool and aqua mist, hawaiian shores and tropical teal ink,
I inked the card stock for an ombre effect.
Then, I added some drops of water with my paint brush.
While those dried, I stamped my sentiment (also from Feather Finery)
on a double-ended banner die cut from vellum and heat embossed it in white.
I stitched around the card and added an aqua mist and a tropical teal
button with some rustic cream button twine.

I'm also linking this cards up to this week's


Thanks for looking! 

Thursday, April 24, 2014

Welcome to my happy place


My friend, Lisa Elton asked me to share my craft space today with the Craft Storage Ideas blog
I figured this was the perfect opportunity to clean up my space (yes, it's not usually this neat!)
and do a little purging as well (such a great feeling!)

My craft space is located in a corner of our basement, under a west window, 
so in the afternoons, I get a lot of nice light.
I share my space with my daughter. 
When we'd first set up the space like this, last June, I thought that I'd have two tables facing each
other so we can each have our own space to craft, which worked throughout the summer.
Then, in the fall, we dog sat for a month. To keep the dog from chewing up Sage's Lego Friends,
I suggested that Sage use the craft table for her toys. and this is what she's done ever since! LOL!
When she does want to craft, she either pushes her toys out of the way or comes over to my side.


As you can see, she didn't quite catch the enthusiasm for tidying up her space. ;)

Moving on to my side...


On my side of the table, at the end of the left hand side, I keep my sewing machine set up,
which I use on a lot of my paper crafting projects.

On the right hand side, I have my work station.


I store my stamps in Tim Holtz folders in baskets. They're located right in front of me, 
so they're easy to grab and use, since I stamp on all of my projects.

I picked up the baskets at the local dollar store and I store them by manufacturer.
The first basket holds my Papertrey Ink stamps, the second one holds 
my Reverse Confetti stamp sets and the third one holds all of the others.


Beside these baskets, behind my Tonic 12" paper trimmer, I have a caddy that I got at Winners
that holds my scissors, paper-piecing tool, craft knife, pencils, paint brushes, pens, etc.
It also holds some 8.5x11" white card stock from Staples that I use to make my card backs.


Behind that caddy are legal sized hanging folders, 
in which I store my 12x12 patterned paper, sorted alphabetically by manufacturer.


Next, I have some more hanging folders (these are letter size), 
in which I store my 8.5x11" card stock.
In front of these hanging folders, I have one of three muffin tins that I spray painted white.
This one holds my baker's twine.


Beside these, I have my four-tiered rotating trays that I got from Harbor Freight.


On the top layer, I store my button twine, some embossing paste, mist bottles, glossy accents, etc.
On the second layer, I have my tape runners, sanding block, corner rounder, date stamps, Tim Holtz blending tools, etc.
On the bottom two layers, I store my Papertrey Ink, sorted by colour families, as well as my Versafine Black Onyx ink and Versamark pad. These are the inks I use most often.

Beside my table, to my right, I have an IKEA cart that I use as my die cutting station.


On the top, I have my Big Shot, smaller paper trimmer and ATG gun.
Behind these, I have a display stand that I use to store some stamps that I don't use terribly often, 
my punches and my larger dies/coverplates/impression plates.


Below these, on the top shelf, I have two boxes that I got from Winners.
The one holds my 6x6 patterned paper pads, sorted alphabetically by manufacturer.
The other holds my photos waiting to be scrapbooked.


On the bottom shelf, I have my heat gun and a basket of ink.

Behind where I sit is my IKEA expedit shelf, which I love!
On the top of my shelf, I have some things that I love, including cards sent to me 
from crafty friends, the Bible verse I cut from vinyl on my Silhouette and 
one of the magazines where my card was featured on the cover.


Here's what I store on the shelves...
On the top left hand side, I have the binder that holds my dies
a box of cards and a box that holds plastic bags.
Beside that, I have some containers that hold my most used embossing powders and two more 
painted muffin tins: one holds my PTI felt & the other my embossing powders & washi tape.
Below those, is a basket that holds my purchased embellishments, including decorative brads,
enamel dots, mini clothes-pins, chipboard & acrylic embellishments, etc.
Beside those are some containers that hold my buttons, sorted by colour, 
and my Pretty Pink Posh sequins, ribbons & twine.


To the right of these shelves, I have some more boxes (these hold more cards & ribbon)
& my candy jar that holds my sugar free Werthers candies.
Beside those is my docking station so I can listen to music while I craft.
Under those is a box that holds some stamp boxes that I use to package card sets, 
my large ruler and some paper bags I use for treat bags.
Then, I have a wire basket (from Winners) that holds my packages of 8.5x11" card stock. 


Moving on to the bottom two shelves, I have a Creative Memories accordion folder that holds my patterned paper scraps, again sorted alphabetically by manufacturer, and my Chickaniddy Crafts products, stored in large plastic bags.
The cloth container beside those holds some miscellaneous tools, large clear bags, etc.
Below these, I have some rubbermaid containers. 
The top one holds spare twine, adhesive refills, extra Tim Holtz refills, etc. 
The bottom one holds envelopes.
The shelf beside those holds some craft foam, watercolour and acetate pads, page protectors and my notebooks where I sketch out ideas.

Oh, and I should explain that the wicker basket beside the shelving unit has my Monthly Moments binder and accessories in it.


And, beside these shelves, I have some black binders in which I store my alphabet stickers, 
sketches and online course print-outs. 
Beside these, I have my and my 12x12" card stock.
Then, I have the magazines in which I've been published.
Below those are two more rubbermaid containers. The top one holds my patterned paper scraps 
that I don't really use much (these are available for Sage to use).
The bottom one holds my Silhouette vinyl, extra blades, etc.
The last container holds some sewing projects and my watercolour paints.


And there you have it -- my happy place. :)

Thanks for looking!

Wednesday, April 23, 2014

A reminder about the Pretty Pink Posh blog hop


Just popping in with a reminder that the Pretty Pink Posh Blog Hop
is coming up this Saturday.
The blog hop will run from the 26th to the 28th.
Paulina will have a spot to link up your sequin shaker cards on her blog.
It's sure to be a lot of fun!
And check out these fabulous sponsors...


And, she also has a coupon, if you'd like to add some
Pretty Pink Posh sequins to your collection:


And, she also has a tutorial on her blog, if you'd like to learn how to make a sequin shaker card.

Before I go, I just wanted to share a card I made, using some


I started with some My Mind's Eye patterned paper as my background.
Then, I diecut some aqua mist cardstock & a sheet of Crate Paper patterned paper
 using my Mama Elephant Femme Frames die.
I diecut the Papertrey Ink Mighty Oak coverplate from the Crate Paper diecut
and adhered the leaves to my cardstock.
For the trunk, I inked the patterned paper with some brown ink and my Tim Holtz blending tool
before adhering it to my card.
I adhered the Pretty Pink Posh Springtime Mix sequins with glossy accents.
For my sentiment, I diecut a PTI double-ended banner die from some raspberry fizz cardstock
and stamped my sentiment (from KIS:birthday) in versamark and heat embossed it
in seafoam white.

Thanks for looking!

Tuesday, April 22, 2014

Chickaniddy Crafts April Card Sketch


I have card to share today that I made with 
this month's Chickaniddy Crafts sketch & the 

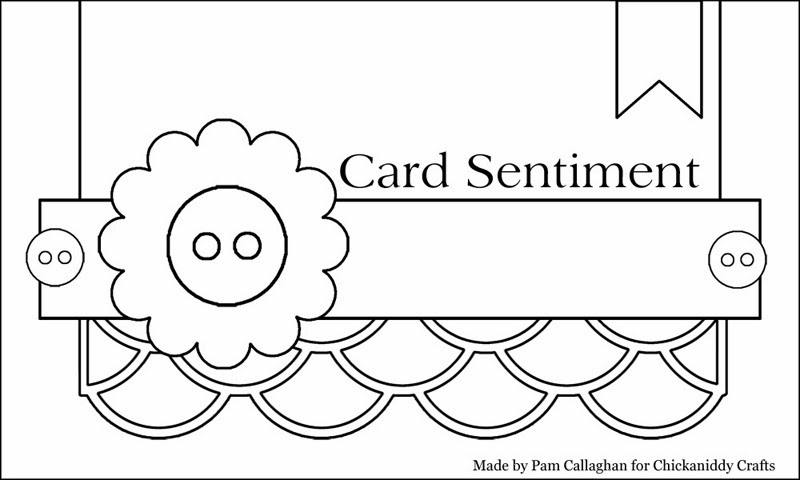
Here's this month's sketch:


For my card, I used the sketch but changed it up.
Here's my card:

Supplies: Paper (TG140S12; TG140S07, TG140S08) ; Sticker Sheet (TG14EB02)

Since I prefer making tall cards over wide cards, I compressed the sketch and made it taller
to accommodate my preferred card orientation.
I started with creating my background using the Piggy Tails patterned paper.
I diecut my scallops (using Reverse Confetti's Double Edge Scallop Border), from the back of the Itty Bitty Ballerina patterned paper and layered them over each other.
My sentiment was cut from the This & That patterned paper. 
I added some twine and a bow before matting my card on the back of the Itty Bitty Ballerina patterned paper.
I stitched a button to the stacked cups sticker and adhered it to my card using dimensional adhesive.

Tip: When using a sticker, feel free to add some dimensional adhesive to the back
to give your card more dimension and interest.


Be sure to stop by the Chickaniddy Crafts blog to see Meredith's & Kathy's takes on the sketch.

Thanks for looking!

Monday, April 21, 2014

Crafty Peeps Card Kit Club - April

Today, I have four cards to share that I made for the Card Kit Club
that I'm a part of with some of my "crafty peeps".

This month's gorgeous kit was provided by the incredibly talented Kristii Lockart --
I just love her style!
She sent us a packaged filled with Simple Stories patterned paper & some fun die cuts.

Here's the first card I made, using the patterned paper, card stock and "thanks" die cut
from the kit.


I cut the patterned paper on an angle for the tilt and added 

My next card uses more patterned paper from the kit....


I love that woodgrain and used it as a background, but added another strip of patterned
woodgrain along the top.
I cut out the mini journaling cards and stamped a sentiment from Papertrey Ink's Slide Frame
("hello") and Wet Paint II ("you").
A few PTI buttons and twine finish it off.

I gave this next card to my husband yesterday for our eighteenth anniversary....


Kristii sent this Chevron Coverplate die cut along in the kit, so I backed it 
with some PTI tropical teal & aqua mist card stock, with a strip of the solid Simple Stories 
patterned paper from the kit in between.
I made the tag using some aqua mist card stock and Reverse Confetti's Tag Me die, which I elongated by only die cutting the top of the tag and trimming out the rest with my paper trimmer.
The sentiment is from Reverse Confetti's Lots to Say -- can you believe I don't have a stamp
that says "Happy Anniversary"? Crazy!
I added a little bit of heart patterned paper from the kit and a PTI button and twine.

And lastly, I made this card...


I die two sheets of the kit's patterned paper with my Mama Elephant Femme Frames dies
 (the floral & a solid navy.)
I adhered these to some aqua mist card stock for my base and stamped
the sentiments from PTI's Wet Paint in navy.
To finish it off, I added some 4mm sparkling clear sequins from Pretty Pink Posh.

 Please hop on over to my talented crafty peep, Jen Carter's blog
to see what she made with Kristii's kit.

And speaking of Pretty Pink Posh.....


Just a reminder that the Pretty Pink Posh Blog Hop
is coming up this Saturday.
The blog hop will run from the 26th to the 28th.
Paulina will have a spot to link up your sequin shaker cards on her blog.
(& she also has she also has a tutorial on her blog
if you'd like to learn how to make a sequin shaker card.)
It's sure to be a lot of fun!

Thanks for looking!