Wednesday, June 01, 2011

Scrapping Everyday Miracles Blog Hop


Welcome to the Scrapping Everyday Miracles Blog Hop!

When I first heard about the Scrapping Everyday Miracles blog, I thought that it was a great idea-- offering challenges to scrapbook the everyday miracles in our lives. My faith is very important to me and it's something I definitely want to share with others, especially my children. Providing prompts to scrap the little things that make up our faith, turn our attention to God or give chances to thank or praise Him-- it's very cool. AND, if that wasn't enough, there's also a scrap technique to go with each one. I'm so excited to be a part of this design team-- I think it's going to be great!

I wanted to share a layout I created. It's titled, appropriately enough, "Everyday Miracles."


I used Inspired Blueprints Sketch #74, My Mind's Eye patterned paper, Papertrey Ink cardstock, Woodgrain Impression plate, buttons, twine and stamp sets (Text Style I, Botanical Silhouettes and Beautiful Blessings-- that quote is just so perfect!) The alphas I used are Pink Paislee and the "everyday" is a Creative Cafe stamp that I heat embossed with white embossing powder.

Here's how the hop works:
All you have to do is visit each of the DT's blogs for inspiration, become a follower and leave a comment. There are RAKS to win along the way and if you leave a comment at each blog you could win our grand prize!!!

There are tons of chances to win!
Our Grand Prize is sponsored by Sweet Peach Crop Shop ....


You can check out the Kick off post on the Scrapping Everyday Miracles blog for the DT line up.

Next up in the Blog Hop is Roulien.

You have until Sunday June 5th @11:59pm PST to post your comments at Scrapping Everyday Miracles blog as well as commenting on each DT members blog. Winners will be announced Tuesday....

Don't forget to come back Monday for our First Challenge!

Thanks for stopping by!

Tuesday, May 31, 2011

MIM #17-- attempt #2

Here's my second attempt at this week's Make It Monday at Papertrey Ink: Cracked Glass:


I used Papertrey Ink cardstock, the Mat Stack #4 die & Botanical Silhouettes stamps.

Thanks for looking!

MIM #17 -- attempt #3

Here's my third attempt at this week's Make It Monday at Papertrey Ink: Cracked Glass:


I used Papertrey Ink cardstock, Fancy Flourishes and Botanical Silhouettes stamp sets & Mat Stack #5 die. The buttons were from my stash.

Thanks for looking!

MIM #17-- attempt #1

When I first saw this week's Make It Monday at Papertrey Ink: Cracked Glass, I thought I wouldn't be able to play along, because I don't have any UTEE. But then my friend, Mandy, sent me an email saying that I could have some of hers (she knows how much I've enjoyed playing along with the MIMs!)

So, here's my first attempt, keeping in mind that this technique is completely new to me:


I used Papertrey Ink cardstock, dies from Mat Stack #1 & #5, Fancy Flourishes stamps, the sentiment is from the Botanical Silhouettes stamp set and I used my woodgrain impression plate. The butterfly stamp is SU!

Thanks for looking!

Sunday, May 29, 2011

MIM #16-- attempt #3

Here is the third card that I made this afternoon for Papertrey Ink's Make it Monday #16: Sympathy cards, again using my new PTI Wildflower Garden stamp set. (You can see the first card I made here and my second card here.)


I also used PTI cardstock & twine and did some more masking. The sentiment is from the Think Big Favorites #3 stamp set. The background stamp is from Text Styles I.

Thanks for looking!

MIM #16-- attempt #2

Here is the second card that I made this afternoon for Papertrey Ink's Make it Monday #16: Sympathy cards, again using my new PTI Wildflower Garden stamp set. (You can see the first card I made here.)


I also used PTI cardstock and did quite a bit of masking. The sentiment is from the Botanical Silhouettes stamp set.

Thanks for looking!

MIM #16-- attempt #1

It's a little late in the game, but I decided to make some cards this afternoon for Papertrey Ink's Make it Monday #16: Sympathy cards.

Here's the first one that I made, using my new PTI Wildflower Garden stamp set:


I also used PTI cardstock, twine & button. The sentiment stamp is also PTI, from their Think Big Favourites #3 set.

Thanks for looking!

Friday, May 27, 2011

Five for Friday

1. I took a couple of days off this week. On Wednesday, I drove down to the States with my friend, Susan, to pick up our Papertrey Ink order. Then I spent the last two days reorganizing my stamps using this system. I love how it turned out and am looking forward to using it.


2. I also pulled out all of my inks and organized them into colour groups to restamp them into my book.


I left some spaces to add some new inks (not that I really need any.... ;) )


The second page in this photo is a print out of this Colour Swatch from Papertrey Ink. It's a nice reference for putting colours together.

3. I babysat in the morning for friends' 17-month old. Jonah asked me before he left for school if I knew how to change a diaper. I said: "Well, let's do the math... I had three babies who all wore diapers until they were over 3. With an average of 4 to 5 diaper changes a day, I think it's safe to say that I have changed over 15000 diapers!" That made his eyes go big! Ha!

4. I should have been working in my garden this week, while it was sunny, instead of organizing my scrap goodies (see #1 & #2) and now it's raining.... oh well... what can you do? ;)

5. I posted a Spring Sketch layout on the MSS blog today using Inspired Blueprints Sketch #73:


I decided to rotate the sketch to use it for my layout. I used My Mind's Eye & The Girl's Paperie patterned paper, Papertrey Ink dies, Studio Calico, PTI, SU!, AL & Hero Arts stamps, Basic Grey alphabet stickers & SU! build a brads.


Thanks for looking!

Wednesday, May 25, 2011

Playing along with the...


This month's theme is flowers, which suited me just fine, because I got the 2010 anniversary set: Botanical Silhouettes on Sunday.

I decided to make some thank you cards for my Sunday school volunteers & I managed to get five done last night.

For all the the cards, I used Papertrey Ink cardstock (pure poppy, ocean tides and dark chocolate), twine, buttons, the anniversary stamp set and a stamp BB: Text Style I set. I also used Bazzill cardstock (kraft) and some Fancy Pants patterned paper.


On this one, I added some clear Smooch to the centre of the flowers.


I painted some Smooch over top of the blooms on this one, too.


And had some fun with masking on this one.

Thanks for looking!

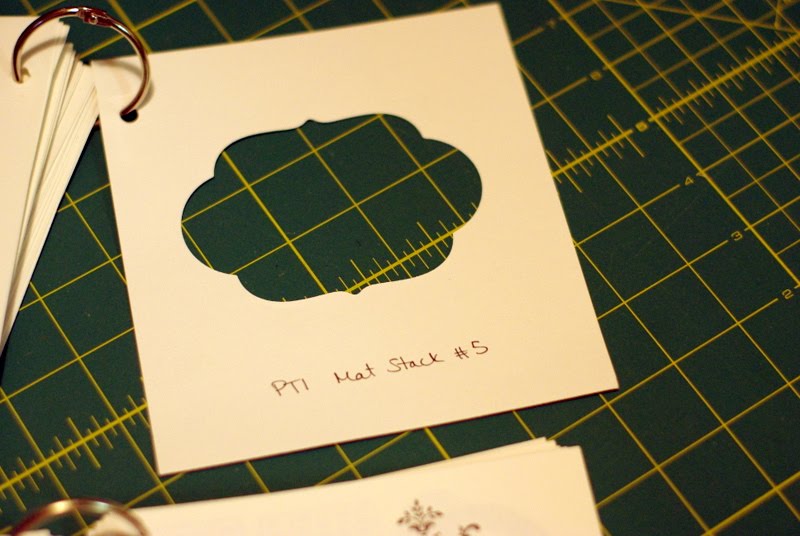
My stamp & dies books

Several weeks ago, inspired by this post, I made a couple of books to help me keep track of my stamp & dies inventory. I thought I'd share them with you, today.

The books are basically the same... They are both 6"x5.5" made with plain white cardstock and chipboard covers, attached together with a binder ring.

For my stamp book, at the front, I have a list of my inks (note, I'm expecting an order of new ink and once I get it, I want to redo this list, in the order of the rainbow.)


The following pages contain all of my stamps, stamped into it with black ink. I have my sentiments stamps sets...


And my images...


I find that this book really helps me when I'm looking for a certain stamp, or just basically reminds me of what I have.

For my dies book, I have my alphabet dies...


...my shaped dies & punches...


... my embossing folders...


... and my impression plates.


Again, this helps me to keep track of what I have. On each page of the book, I've labeled what everything is.

Another cool thing that I can do with these books is use them together, to see what stamps fit with which dies...

For instance, I was thinking of using the top image of my SU! Bliss set...


And wondered if it would fit on my Mat Stack #5 die.


So I took the page with my die and layered it over my stamped image, like this.


And could see how well it would fit.


Thanks for looking!

Tuesday, May 24, 2011

My scrap space

I took some pictures of my reorganized space on Saturday and thought I'd share them here.

So, welcome to my scrap space...


...which is located in a corner of our basement.

On the shelving unit to the left of where I sit, on the top shelf, I store my embossing powders, stamp binders, sheet of fun foam to stamp on, dictionary and tools that I don't use terribly often (i.e. anywhere punch & hammer, CM circle cutters, pinking shears, etc.)


On the second shelf, I store my 12x12 cardstock in clear Cropper Hoppers, my "sketches" binder, my binders containing my alphas (one for black & brown, another for colours) and my Papertrey Ink 8.5x11 cardstock, which I store in hanging files by colour.


On the third shelf, I have clear rubbermaid containers. In these, I store non-Papertrey Ink cardstock scraps (the PTI scraps go back in the hanging file folders with the full sheets), my acrylic paints, my inks and the fourth container has crochet yarn, my SU! spritzer and SU! markers, Q-tips, etc.

On the bottom shelf I have my page protector refills and sewing machine.


On my desk, on the left, I have another hanging files container, in which I store my full sheets of patterned paper, sorted by manufacturer. In front of these, I have my brad holder. Beside the hanging files is a CM accordion file, in which I store my patterned paper scraps. I also have my two trimmers.


I found these colourful baskets at Winners. In the first one, I store my photos. In the second one, I have my tools that I use often (corner rounder, sanding blocks & files, edge distressers), adhesives & thread. In the third are embellishments.


I picked up some more of these black baskets at Dollarama on the weekend. The little one on the left has my Smooch and diecuts in it. The larger one next to it holds my twine, felt & buttons. The one next to that holds my Papertrey Ink stamp sets (which I'm hoping to reorganize this week), my stamps & dies books and my stamp press. The last basket holds my pencils, pens, scissors, craft knives, rulers and craft mat. Behind it are some of my SU! stamp sets.


Next I have some display shelves that Cameron & I had built several years ago when I was selling cards in a couple of local businesses. In these I store my punches (that I use often) and stamp sets.

To the right of my table is the computer desk. If you go around the corner a bit from that, you'll see my new die-cutting station.


I used a wooden island that we had bought years ago at IKEA (until recently, it had been on the other side of the basement, holding an old TV.) You'll notice the pink chair on the right-- this is Sage's craft table. She's quite thrilled that we're sharing the new diecutting station (but that it's actually closer to her!)

I used a couple more baskets to hold my dies...


This larger one holds my alphabet dies (at the back,) my Cuttlebug plates, my TIM Holtz dies and my larger Papertrey Ink dies. It also holds my embossing folders and impression plates. I also have some smaller pieces of Sizzix adhesive sheets in there, too.


This basket holds my Papertrey Ink dies: Mat Stacks, Fillable Frames and flowers.

Thanks for looking!

Monday, May 23, 2011

The difference....

... a year can make!

I've just been blown away by what a difference it is to go for bike rides with Sage this year. Last year, she would complain and often cry when we'd go. This year, she loves it-- which is so awesome because I love to ride my bike!

I made this layout using the MSS product challenge for May: twine. I've struggled to get into the baker's twine thing, but I found some off white and kraft coloured twine at Papertrey Ink and love them! So I used some of the off white here on my layout, on the little Crate Paper journaling tag, over the bike.

I added a PTI fancy flourishes stamp behind the bike, along with some flowers I diecut with the PTI beautiful Blooms dies. The buttons I added are also PTI.


I also used Little Yellow Bicycle & Crate patterned paper, October Afternoon letter stickers, a Hero Arts doily stamp & white embossing powder on the stamped images.

Thanks for looking!