Showing posts with label December Daily 2012. Show all posts

Wednesday, December 05, 2012

A few shots...


from the first week in December. These will be added to my December Daily album.

Having snack after school...


We took the kids to see Rise of the Guardians last night. The blond children are Jordan & Nick, who came along with us with their mom, Tania.


Today, I had the day off, so I ran errands, made some cards and mailed out my Christmas newsletters & family photos.


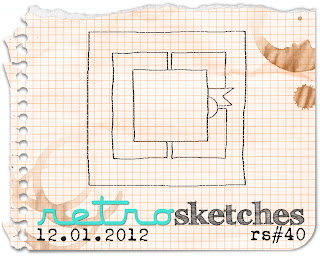
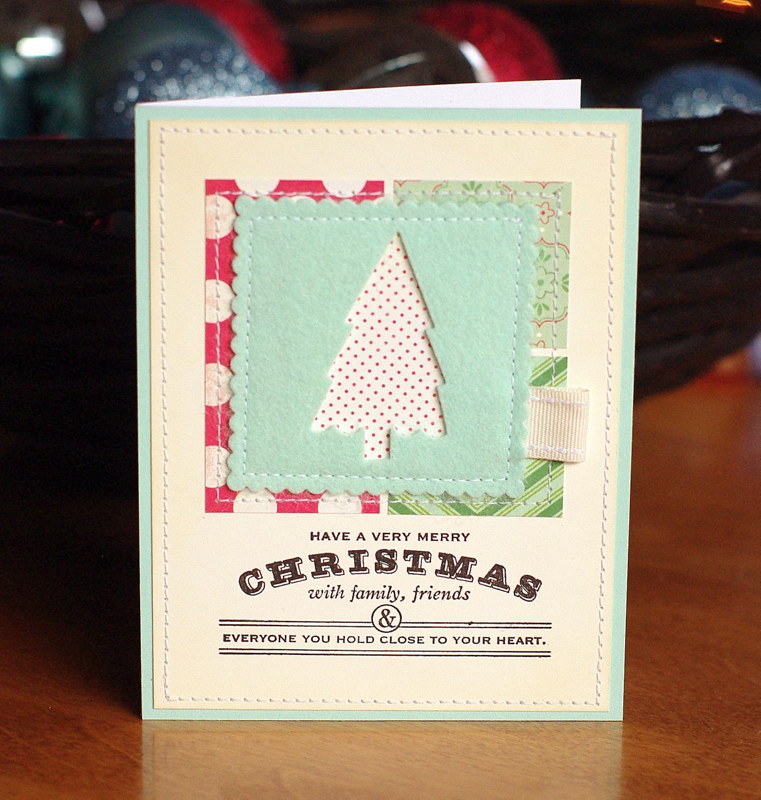
And, here are a couple of cards I made yesterday. This first card is for Retro Sketch #40. Here's the sketch:


For my card, I used Papertrey Ink cardstock (aqua mist, vintage cream), stamp (Stylish Sentiments: Holiday), dies (Love Lives Here: Holiday, LL:Squares), felt and ribbon. I also used October Afternoon patterned paper. I die cut the tree from the felt and backed it with the patterned paper.


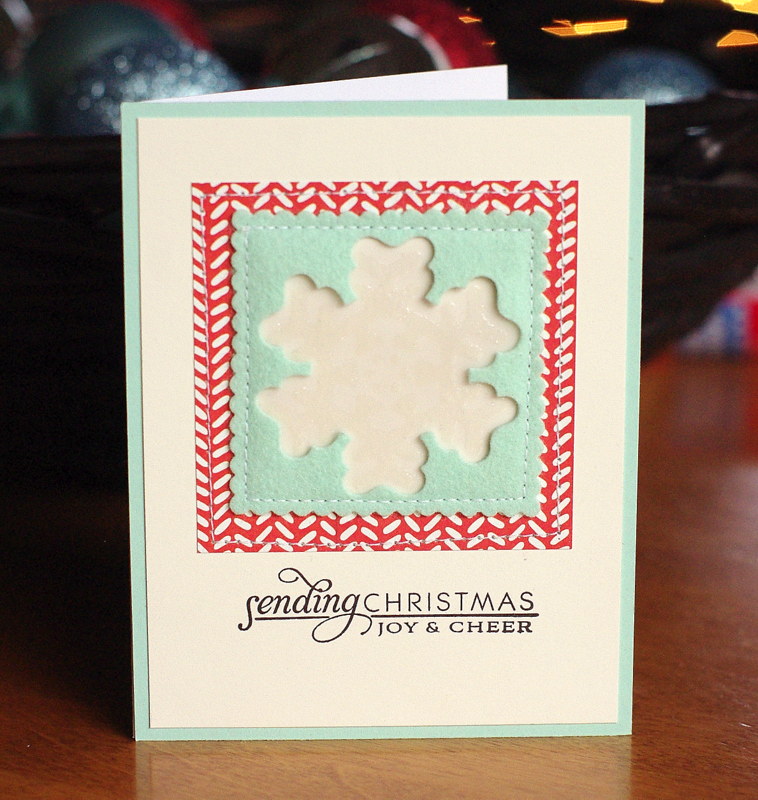
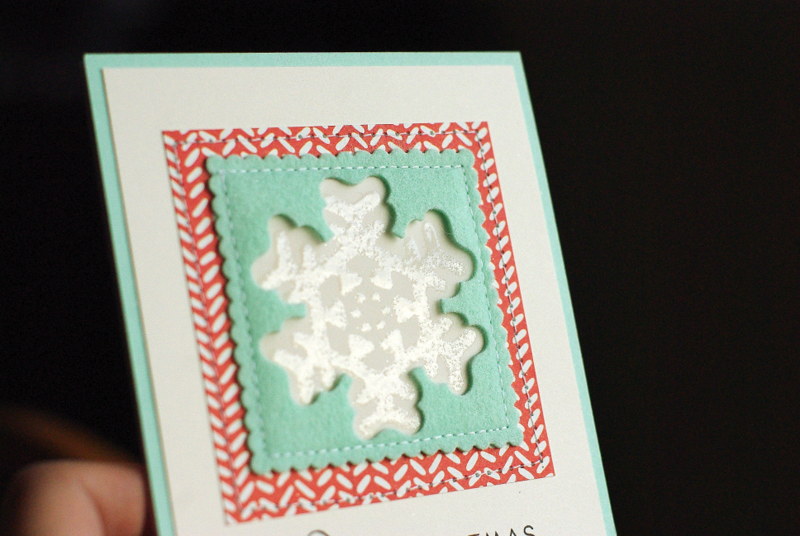
For my second card, I kept the design similar, but swapped out a Snowflake Medley die for the tree. I stamped a Snowflake Medley image with versamark on PTI vellum and heat embossed it, sprinkling on a little Martha Stewart glitter to add some sparkle for this week's MIM at Papertrey Ink: Detail Glitter Technique.


The patterned paper is Studio Calico. Here's a photo where you can see the stamped image a little more clearly:


Thanks for looking!

Thursday, November 22, 2012

December Daily 2012, part 3


Well, I got it done!

I finished my December Daily album with a week and a half to spare!
(You can click here to see my part 1 post and here to see m part 2 post.)

For my part 3 post, I'm sharing the rest of the 6x8.5" pages that I made for ten of the days.

For Dec. 6th, I stamped my PTI Love Lives Here: Holidays stamp set along the top of a sheet of Simple Stories patterned paper. I highlighted the "6" with a circle stamp from PTI's Lovely Layers set. I added a few little SU! pearls to the star ornaments for dimension. The photo will go on the bottom half of the page. (I apologize for the poor photo of this one!)


For my Dec. 7th page, I used some Studio Calico (background) and Simple Stories & My Mind's Eye patterned paper, some MME decorative brads and some PTI dies (block numbers, tag sale #5, double-ended banner). Again, the photo will go on the bottom half of the page.


For Dec. 8th, I used a sheet of Studio Calico patterned paper, my date stamp and some PTI supplies (vellum cardstock, seeing stars dies, button & twine.) I was inspired by this week's Make It Monday at PTI: Layered Vellum Die Cuts. The photo will go at the top of this page.


I created this page for this week's Make It Monday at PTI: Layered Vellum Die Cuts. Here's a close-up of my layered vellum stars:


For Dec. 9th, I used another sheet of Studio Calico patterned paper for the background, to which I added a piece of My Mind's Eye patterned paper diecut with my PTI mat stack 4 die. On this, I stamped the date with my date stamp. The photo will go at the bottom of the page.


I also created this page for this week's Make It Monday at PTI: Layered Vellum Die Cuts, using my Christmas Poinsettia dies from PTI, as well as their vellum. The badge is from an etsy store called A Flair for Buttons.


For my Dec. 14th page, I diecut some PTI Love Lives Here: Holidays trees from Simple Stories patterned paper and put them on a Scenic Route patterned paper background. I added some PTI buttons with PTI twine, as well as a PTI Label Basics stamp at the top. The photo will go at the bottom of this page.


For Dec. 15th, where again, the photo will go at the bottom of the page, I used some Scenic Route patterned paper as the background and diecut some MME patterned paper with my Memory Box die. I stamped another PTI Label Basics label, along with the numbers from Movers & Shakers Sentiments on a piece of MME patterned paper and added a couple of PTI buttons with twine.


For my Christmas Eve page, I diecut some The Girl's Paperie patterned paper with my PTI Limitless Layers: Ovals 3.5" die and on it stamped images from PTI's Navitivity Silhouettes. I added some PTI buttons and twine and a tiny tag diecut of a sheet of Pink Paislee patterned paper from the date. The background patterned paper is Simple Stories.


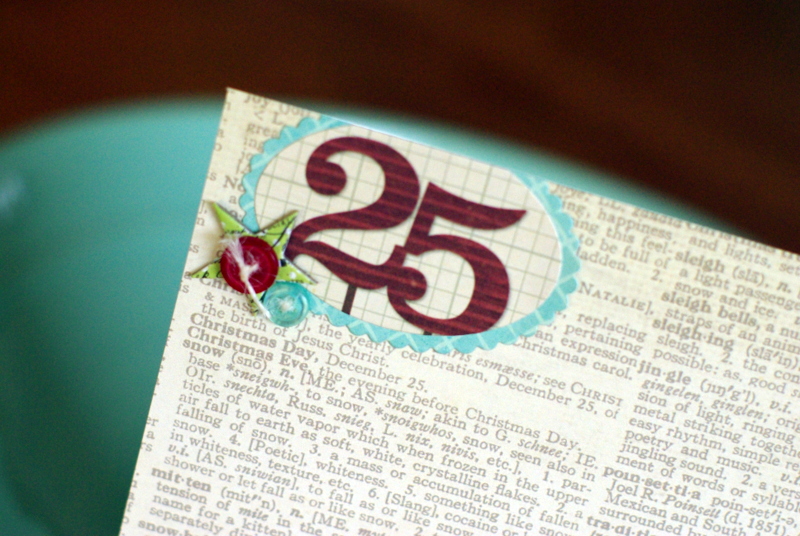
For Christmas Day, I used my PTI Limitless Layers: Ovals 2.25" dies to diecut from some Simple Stories (the "25") and My Mind's Eye patterned paper. I added some PTI buttons, along with a Pink Paislee chipboard star, inked with PTI simply chartreuse ink.


Here's a close up:


For Dec. 30th, I used some PTI patterned paper & vellum, stamps (movers and shakers sentiments), buttons, twine and dies (snowflake medley, tiny tags).


This page was also created for this week's Make It Monday at PTI: Layered Vellum Die Cuts.


And, last, but not least, for New Year's Eve, I used some Studio Calico patterned paper for the background. I diecut some Simple Stories patterned paper with my PTI mat stack 4 die, as well as my PTI Block Numbers die for the date. I adhered this to the page strategically over a white circle on the background and added another A Flair for Buttons badge and two decorative brads (MME for the aqua one and Basic Grey for the little one).


Whew!

Well, I was reminded during this process of why I don't make a lot of mini albums.... I just get a little tired of them towards the end of the process. It's nice though, with the December Daily, because now I can just add my photos and journaling throughout the next month to finish it off--a huge bulk of the work is now done!

Thanks for looking!

Tuesday, November 20, 2012

December Daily 2012, part 2


As I mentioned in my December Daily 2012, part 1 post, I purchased some 5.5x8.5" Martha Steward page protects to use in my December Daily. They came in packages of 5, so I figured that I would use them for 20 of my days for December: four per page protector, using the front and the back, which leaves me room to add a 2.75x4" photo for each day.

I started off making each card fairly simply.... but then realized that this was a little too plain for my liking, so I jazzed them up with some buttons, twine and sewing, keeping them true to my style.

Also, for some strange reason, I was reluctant to pull out my dies or number stickers for these cards, forcing me to get creative with how I numbered them...

Since I posted my December 1 here, the little cards start with Dec. 2nd: I cut down a sheet of Simple Stories patterned paper, stamped around the #2 with a Studio Calico stamp that came with my Cut It Out class and added some PTI buttons with PTI twine.


For Dec. 3rd, I stamped a PTI Snowflake Medley stamp onto a scrap of Scenic Route patterned paper and added a some MME and Simple Stories patterned paper, diecut with my PTI double-ended banner die. The decorative brad is Echo Park. (In my attempt to avoid stickers, I looked through my decorative brad stash and found several with numbers. Score!)


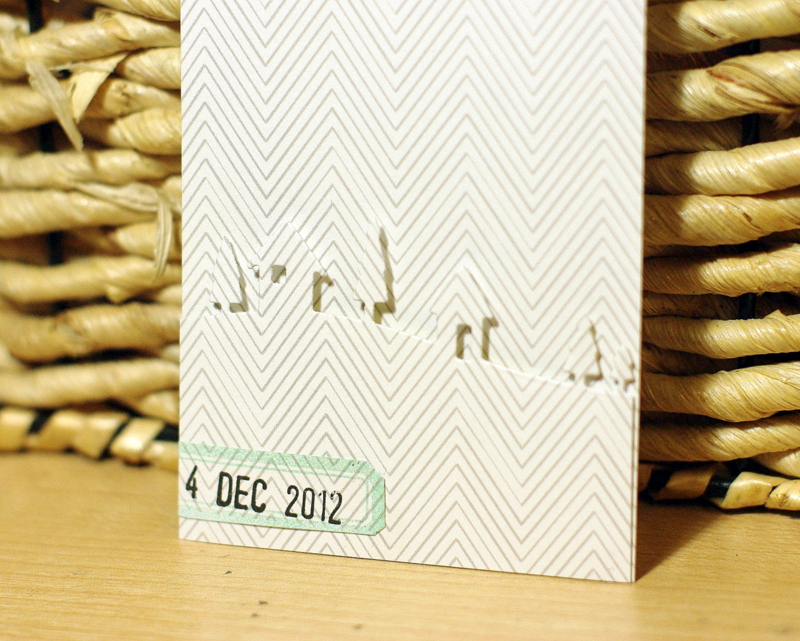
For Dec. 4th, I used my new Memory Box die with some Studio Calico patterned paper. I stamped the PTI label basics label and filled it in with my date stamp.


Here's a better view... I propped up the bottom with SU! dimensional adhesive.


For Dec. 5th, I used some Scenic Route and My Mind's Eye patterned paper, PTI snowflake medley stamps, felt and die, my PTI heart border die for the tiny scalloped edge and another Echo Park decorative brad.


December 6, 7, 8 & 9 will have their own 8.5x6" pages. For December 10th, I used added a strip of Scenic Route patterned paper to a Bingo card cut from a sheet of Simple Stories patterned paper. I stamped around the "10" with the same stamp I used for Dec. 2nd and added some stitching, PTI buttons and twine.


For Dec. 11th, I used some Girl's paperie and Simple Stories patterned paper, a PTI label basics stamp and two MME decorative brads. I just hand wrote the "eleven."


For Dec. 12th, I used Bo Bunny patterned paper as the base and diecut some MME and Girl's Paperie patterned paper with my PTI double-ended banner die. The decorative brad is also MME.


For December 13th, I used my PTI Holiday Lights stamp set, on a piece of Lily Bee patterned paper.


Dec. 14 & 15 will each have a 8.5x6" page. My Dec. 16th card is the same as my Dec. 10th, but I used some PTI felt and Snowflake Medley die to highlight the number. To diecut the inside of the die, I used my PTI buttoned up die.


For Dec. 17th, I used Scenic Route patterned paper and my new Simon Says stamps and die, as well as some PTI buttons & twine. The "17" was stamped from my PTI Movers and Shakers sentiments stamps.


Dec. 18th: I stamped my PTI Holiday Lights stamps onto some Bo Bunny patterned paper and added my date stamp.


Dec. 19th: I used The Girl's Paperie patterned paper, my PTI pinking shears border die and a MME brad.


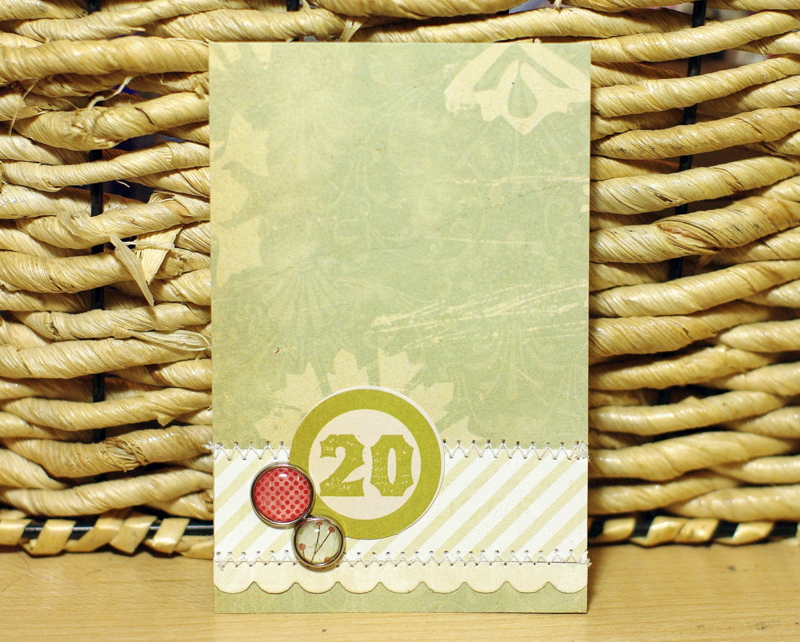
For Dec. 20th, I used Cosmo Cricket, MME & Bo Bunny patterned paper, my PTI heart border die, two MME decorative brads. The "20" was punched from a sheet of Pink Paislee patterned paper.


My Dec. 21st card is the same as Dec. 10 & 16, but this time, to highlight the number, I used a Pink Paislee mistable chipboard shape, inked with some PTI pure poppy ink.


For Dec. 22nd, I used some Bo Bunny, October Afternoon, MME (diecut with my PTI heart border die) and Studio Calico patterned paper. I stamped the "22" with my PTI Movers and Shakers sentiments stamps and added some PTI buttons with twine.


For Dec. 23rd, I stamped some MME patterned paper with my PTI Holiday Lights stamp set. The "23" was punched from a sheet of Pink Paislee patterned paper.


December 24th & 25th will have their own 8.5x6" page.

For Dec. 26, I used Scenic Route, Pink Paislee and MME patterned paper, PTI buttons and twine and Simon Says stamp & die.


For Dec. 27th, I used MME & Pink Paislee patterned paper, as well as my PTI heart border die.


For Dec. 28th, I used Cosmo Cricket & Bo Bunny patterned paper and my date stamp. For this week's Make It Monday at PTI: Layered Vellum Die Cuts, I diecut some PTI Snowflake Medley snowflakes from some PTI vellum cardstock and topped them with a PTI button and twine.


For Dec. 29th, I used the same supplies as for Dec. 10, 16 & 21, but this time, to highlight the number for the date,  I diecut some PTI Snowflake Medley snowflakes from some PTI vellum cardstock (again for this week's Make It Monday at PTI: Layered Vellum Die Cuts), and punched out the centre of each snowflake with a 1/2" circle punch.


December 30th & 31st will have their own 8.5x6" page, which I hope to get finished this week.

Thanks for looking!

Saturday, November 17, 2012

December Daily 2012, part 1


So after deliberating about it a bit, I decided to make a December Daily again this year. I'd made my first DD in 2008 and my second in 2010, so I figured that it had become an even-year-thing for me. ;)

My first two DDs (click here for 2008 and here for 2010) were made as chipboard mini-albums. I'd thought of going this same route again this year and of using my polaroid frame from PTI's Fabulous Frames, but then, I thought about how I like the idea of Project Life, even though I have no desire to make a PL album. I like the idea of slipping things into the different page protector slots. So I went to Staples and bought a 5.5x8.8" album and a package of Martha Stewart page protectors with four pockets each.

For the cover, I was inspired by this card sketch that Lori posted at Love is in the Details:


Here's my cover:


I used a sheet of Crate Paper patterned paper that pulled together a lot of the colours I wanted to use in my album.

I added some PTI cardstock (aqua mist) and My Mind's Eye patterned paper diecut with my PTI dies (tag sale #5 & double-ended banner). I stamped on the cardstock with a PTI stamp from the Fillable Frames #8 set and added a Flair badge.


Inspired by this week's Make It Monday at PTI, I decided to add a pocket to the front. I diecut the "December 2012" using my PTI modern alphabet dies. For the pocket, I stamped with PTI Snowflake Medley stamps and then ran it through my Big Shot with my PTI Simple Stripes impression plate. I added a strip of aqua mist cardstock diecut with the double-ended banner dies, a couple of buttons and a Pink Paislee chipboard heart that I inked with PTI Fine Linen ink.


Here's the tag that gets pulled out of the pocket. I stamped on it with PTI fresh snow ink and more Snowflake Medley stamps, as well as a sentiment from PTI's Shutterbug Special set.


On the back of the cover, I adhered a sheet of Scenic Route patterned paper. To this I added the negative that was left over from cutting out "December" for my title page. I added a strip of MME patterned paper from my scraps, as well as a Crate Paper tag that I trimmed down. I inked up another Pink Paislee chipboard shape (this time an arrow with PTI Pure Poppy ink) and added it, strategically pointing to the "1" for my date. A little bit of kraft button twine finishes it off.


So, the title page and one day done, 30 more days to go.... ;)

Thanks for looking!